Continuity Camera not working? Fix Apple’s most common Mac and iPhone problems
Apple's continuity camera feature lets you use your iPhone as a high-quality webcam, but when it's not working, it's frustrating. Here's how to fix it
Apple computers and monitors can often feel like the best in the world, yet their built-in webcams, even that found on the $1,499 Apple Studio Display, can feel woefully out of step with the times. Thankfully, Apple has a secret weapon buried in macOS and iOS called Continuity Camera.
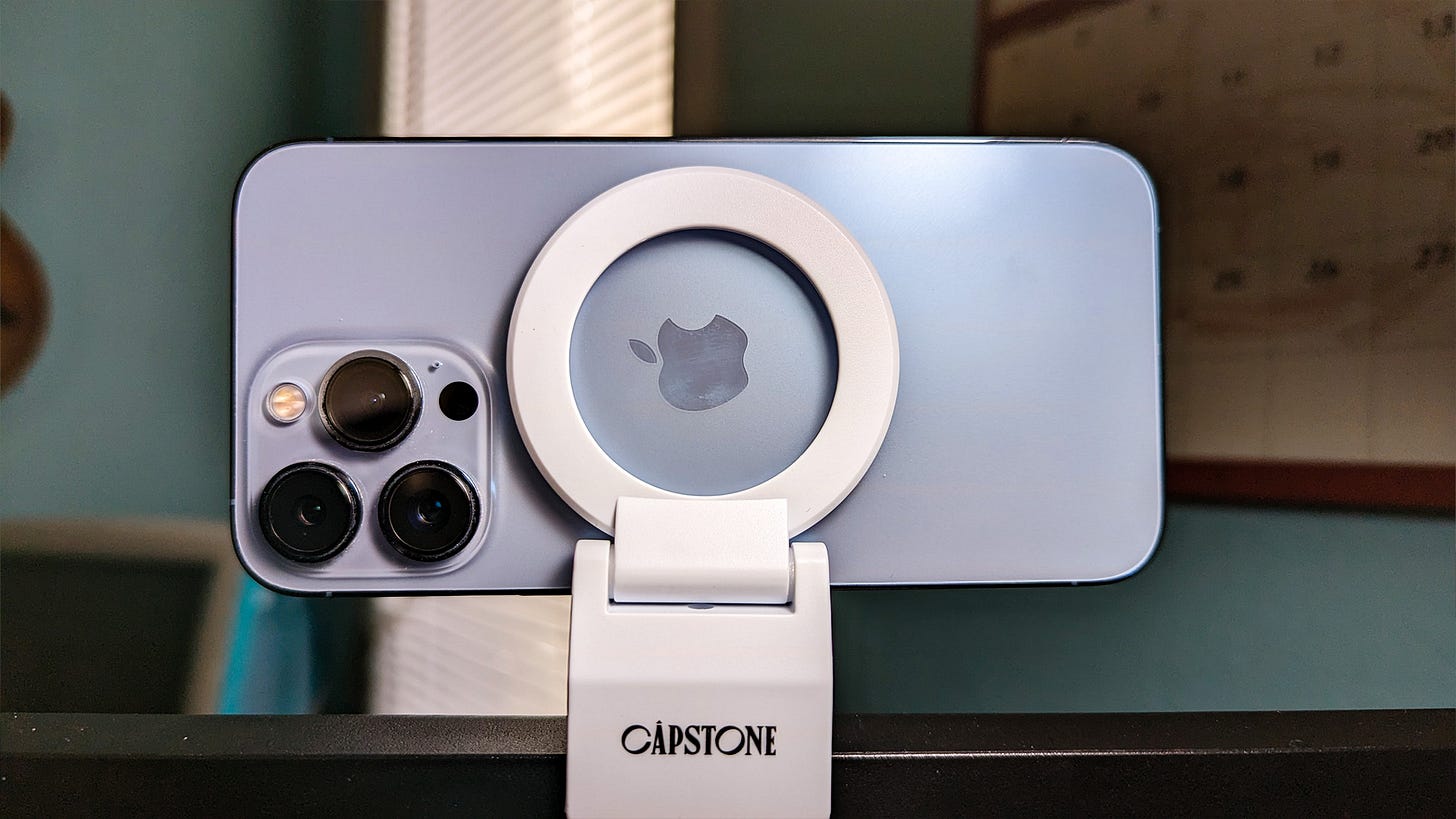
This feature allows you to, with the proper mount (such as this Capstone mount for desktops or this Belkin one for laptops), attach your phone to your monitor and use it in lieu of a dedicated webcam. When it works, it’s a perfect way to upgrade your video calls without investing in extra hardware, but when it doesn’t, you’re left with a blurry built-in MacBook Air camera or worse, a black screen. Before you throw your hands up and start searching for the best webcams, try the steps in this guide.
How to use Continuity Camera
🎥 Start a video call
🔒 Make sure your phone is locked
📱 Place your iPhone on your chosen mount, with the main camera facing you (not the selfie camera)
✅ Select your iPhone from the camera list (it should auto-select)
😀 Smile (or don’t – I’m not your dad)
1. Check the basics
Continuity Camera works on any iPhone running iOS 16 from 2018 onward and any Mac that can run macOS Ventura. If your devices meet those criteria, it’s time to check the basics.
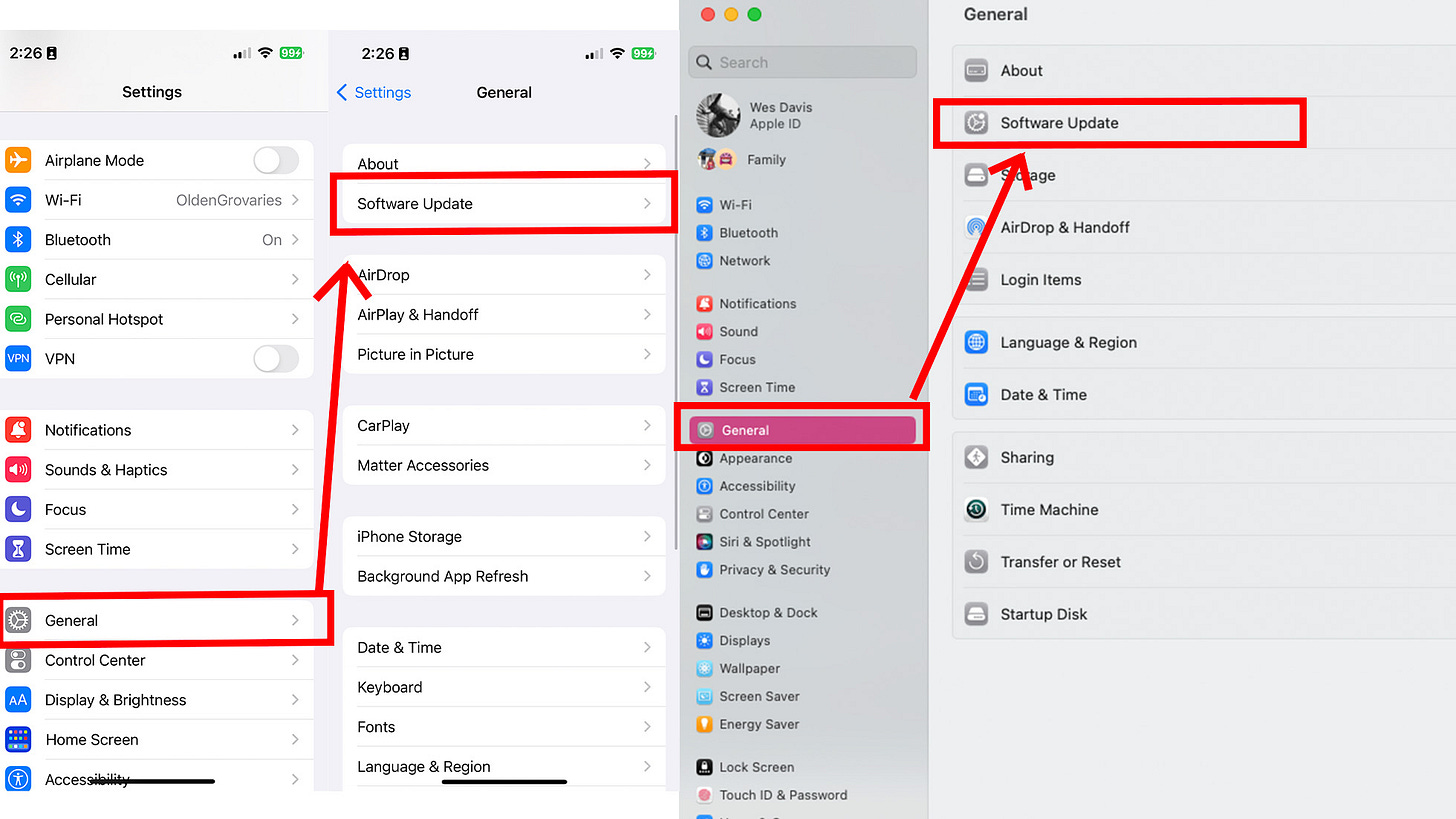
Update your software: For the Mac, go to System Settings > General > Software Update to check, and for the iPhone, Settings > General > Software Update. If you’re not prompted to update, tap or click “Check for Updates.” If your iPhone is able to run iOS 16 and your Mac can be updated to macOS Ventura (macOS 13), you’re good to go. If not, unfortunately, the feature won’t work.
Check that Wi-Fi and Bluetooth are on: Make sure you have Wi-Fi and Bluetooth turned on for both devices. For Mac, click Wi-Fi in System Settings and make sure Wi-Fi is toggled on (it doesn’t need to be connected to a network), then do the same in the Bluetooth setting. On iPhone, you can slide your finger down from the top right corner of your screen and check the Wi-Fi and Bluetooth icons – if they’re blue, that means they’re on for sure.
Make sure your camera is selected: Check that your camera is selected. Whatever app you’re using should have a way to do this. In the FaceTime app, it’s under Video in the menu bar, for instance.
Lock your screen: Finally, make sure your iPhone screen is locked – Continuity Camera doesn’t work if it’s unlocked. Oh, and make sure the camera lens isn’t covered by anything.
2. Check iPhone Handoff Settings
Handoff is how macOS and iOS devices allow you to do things like seamlessly copy things on your iPhone and paste them on your mac or open a webpage you’re currently looking at your Mac on iPhone instead. It’s also where you’ll find the Continuity Camera toggle.
Handoff: Navigate to Settings > General > AirPlay & Handoff and check to see if Continuity Camera is toggled on (it should show a circle with a green background).
3. Try it wired
Even with all these conditions satisfied, sometimes your Mac and your iPhone will still refuse to see one another. Luckily, if you have a Lightning cable handy, you can actually run Continuity Camera wired as a last (and possibly best) resort.
Plug the USB or USB-C end of a Lightning-to-USB cable into your computer (directly if possible, as hubs can occasionally be unreliable).
Plug the Lightning end into your iPhone.
Lock your iPhone and mount it to your chosen mount (or just hold it with the cameras facing you). Continuity Camera should start up.


